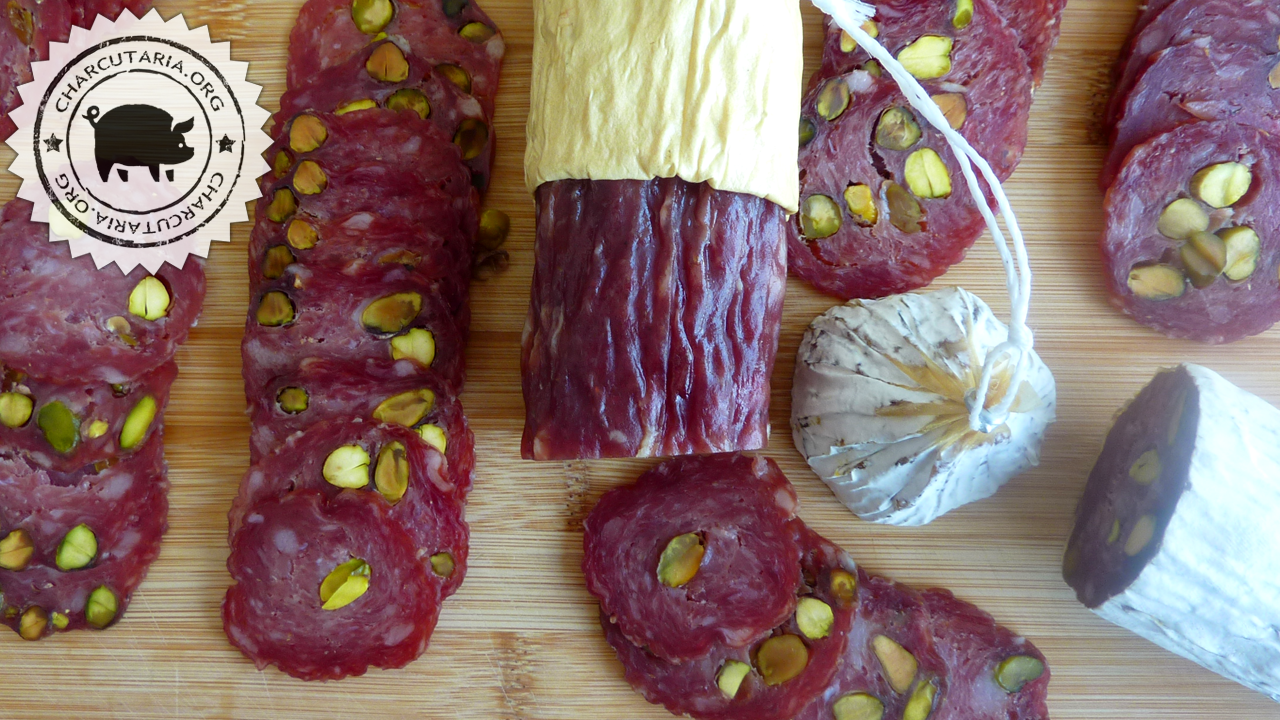
Fazer salame em casa pode parecer um desafio muito difícil no começo, mas com boas leituras e seguindo os procedimentos básicos perceberá que é mais fácil do que parece. Não adianta achar uma receita, pois na produção de carnes curadas, como é o caso do salame, mais importa entender o funcionamento de cada processo do que uma receita em específico. É mais vantajoso criar sua própria receita básica seguindo os princípios do processo do que pegar uma receita pronta e aplicá-la sem entender o que está acontecendo.
Caso nunca tenha feito salames, leia primeiro o post Como fazer salame artesanal em casa
Receita de salame com pistache
Ingredientes
2000 g pernil suíno;
40 g sal; 2%
6 g pimenta do reino moída; 0,5%
10 g açúcar;
6 g sal de cura 2 (6% de nitrito, 3% de nitrato e 93,75% de sal);
5 g alho em pó;
5 g semente de coentro;
5 g mostarda moída;
5 g realçador de sabor glutamato monossódico;
pistache descascado – à gosto.
2 g antioxidante extrato de alecrim; – auxilia na prevenção do ranço/oxidação;
0,3 g cultura starter (bactérias láticas) diluída em 50 ml de água filtrada – aplicar na massa;
0,20 g de cultura mofo branco penicilium nalgiovense diluída em 100 ml de água filtrada;
Tripa de colágeno calibre 50 para embutir.
Preparo do salame
Modo de preparo do salame
- Refrigere a carne, preferencialmente deixe um tempo no congelador para que fique quase congelado(4ºC);
- Corte a carne e a gordura em cubos para passar pelo moedor ou em pedaços bem pequenos caso não vá utilizar um moedor. Retire o máximo de nervos que conseguir;
- Caso opte por moer moedor, use o disco com furos médios;
- Dissolva a cultura starter na água filtrada e deixe por 5 minutos;
- Misture a carne e a gordura com todos os condimentos e aditivos, exceto a cultura mofo penicilium;
- Misture bem com as mãos ou batedeira orbital em velocidade baixa por 2 minutos ou até que a mistura fique pegajosa;
- Coloque a mistura no ensacador de linguiça e encha a tripa de colágeno calibre 55. Deixe uma sobra para amarrar a ponta com barbante;
- Fure quaisquer bolhas de ar que aparecerem com uma agulha fina;
- Agora será preciso iniciar a fermentação da cultura starter adicionada. Para que o processo ocorra é preciso manter a umidade elevada, pendure e use um umidificador para manter a umidade no ambiente;
- Deixe por 72 horas em temperatura ambiente para fermentar. Esse momento é importante pois a cultura starter deve prosperar impedindo que outras colônias proliferem;
- Ao final da fermentação inicie a maturação/secagem em ambiente frio(até 14ºC) e com umidade alta(entre 70% e 85%). Deixe secando por 2 a 6 semanas antes de experimentar;
- O salame estará pronto quando perder entre 35% e 45% do peso inicial.
- Guarde na geladeira ou embalado à vácuo no freezer.


Maturação dos salames
Salame 1
DIA | PESO | % PERDA
24/10 | 759g | 0%
06/12 | 430g | 43,35%
24/12 | 405g | 46,64%
Salame 2
DIA | PESO | % PERDA
24/10 | 752g | 0%
06/12 | 408g | 45,74%
24/12 | 379g | 49,60%
Salame 3
DIA | PESO | % PERDA
24/10 | 708g | 0%
06/12 | 422g | 41,40%
24/12 | 389g | 44,06%

Boa noite
qual a quantidade de gordura na receita?
A gordura presente naturalmente no pernil, que geralmente é de aproximadamente 15%.
Olá, estava efetuando a compra, e somente 3 produto a frete ficou em quase 70 reais. Muito alto referente as outras lojas em que vi.
Não há possibilidade de diminuir esse frete?
Bom dia Eduardo.
Algumas receitas do site possuem duas etapas: primeira (cura) utilizando sal, sal de cura e açúcar; segunda (maturação) utilizando os demais temperos, páprica, pimenta do reino, etc…
Outras receitas adicionam todos os temperos logo na primeira etapa (cura).
Qual a diferença no resultado final dessas duas formas de preparo?!?!
Outra dúvida, lavar ou não a peça após a cura?!?!
Desde já agradeço.
Não vai haver grande diferença no sabor em produtos que ficam bastante tempo pendurados, pois há tempo suficiente para uma boa distribuição dos temperos. Acrescentando antes tem uma proteção adicional na etapa da cura, pois boa parte dos condimentos também tem ação antibacteriana e fungicida. Mas o resultado final será o mesmo, então opte pelo processo que achar mais conveniente na sua produção. Não é necessário lavar, só se quiser uma superfície mais limpa/visível durante o processo. Todos os condimentos e aditivos adicionados podem permanecer na superfície durante a etapa da maturação, portanto remover é opcional.